
Official websites use .gov
A .gov website belongs to an official government organization in the United States.
Secure .gov websites use HTTPS
A lock (
) or https:// means you’ve safely connected to the .gov website. Share sensitive information only on official, secure websites.

Topics
Data & Maps
Surveys & Programs
Resource Library
FAQs-Online Reporting Instrument
FAQs-Online Reporting Instrument
How Do I...
- Find videos containing information on using the online reporting instrument?
- Do I need to complete every survey?
- Navigate the survey and report questions on a survey?
- Navigate to different screens?
- Enter data on a screen?
- See a preview of my survey questions to gather data?
- See the pop-up message that went away when I clicked on the background?
- Add Locations that are missing?
- Delete Locations?
- Report for locations that are no longer active?
- Move forward when I receive an Error or Warning on a screen?
- Complete the economic census in multiple sessions?
- Get back to the question view, when I am taken to the “Location List” screen?
- Correct my data that were already entered (or already submitted)?
- Download spreadsheets?
- Upload spreadsheets with data?
- Print a copy of my responses (before and/or after submitting data)?
- Verify my submission was received?
- What is the “View All” link on the “Step 1 - Report Dashboard”?
- See the locations that were listed on item 5A of the NC-99001(L) for the 2016 Report of Organization survey in the 2017 Economic Census?
How do I find videos containing information on using the online reporting instrument?
Go to the How-To Videos page.
Do I need to complete every survey?
Yes, if you received a survey, it should be completed whether the location is closed, sold, inactive, leased to another company, or added as a location to another company (such as a parent company reporting for subsidiaries). Please enter any explanations in “Item 31: Remarks” (or “Item 4: Remarks” for the Report of Organization survey).
If applicable, see How do I report for locations that are no longer active?
How do I navigate the survey and report questions on a survey?
From the “Step 1 - Report Dashboard” screen, click the “Start” button to begin reporting for a survey. You can use the “Go to Screen” dropdown at the bottom of a question screen to go to screens that were already visited (or uploaded via a spreadsheet).
Each survey should cover calendar year 2017. If book figures are not available, estimates are acceptable. Please enter any explanations of data in “Item 31: Remarks” (or “Item 4: Remarks” for the Report of Organization survey).
How do I navigate to different screens?
You can use the top banner to navigate to the Overview screen, the Step 1 - Report Dashboard screen, the Step 2 - Review screen, or the Step 3 - Submit screen.
If you only have one survey listed on “Step 1 - Report Dashboard,” step 2 and step 3 are grayed out until you complete step 1.
The banner color turns orange for the screen you are on.
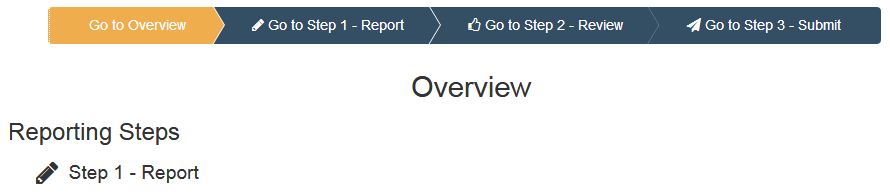
When you are in a survey on a question screen, the “Go to Step 1 - Report” banner will be orange, but you can click on the banner for “Go to Step 1 - Report” and you will be taken back to the “Step 1 - Report Dashboard” screen.
How do I enter data on a screen?
The “General Reporting Guidelines” screen provides information on Reporting Period and several examples for how to report dollar figures and/or percentages. These fields do not allow data input, click the “Continue” button to move to the next screen, which will allow data entry.
How do I see a preview of my survey questions to gather data?
From the “Step 1 - Report Dashboard” screen, in the “Print / Preview Survey Questions” column, click the link for “Preview Survey,” which will open a new tab in your browser with a PDF of the survey.
If you have more than one survey on the “Step 1 - Report Dashboard” screen, click the “Print Surveys to PDF” button, which opens a pop-up and you can select multiple surveys or choose the top check box to select all the surveys. Click the “Continue” button and follow the steps to open a Zip file with the survey previews.
How do I see the pop-up message that went away when I clicked on the background?
Click the “Messages” button at the top right of any screen, to view messages for printing surveys to PDF, downloading or uploading spreadsheets, and submitting data.
How do I Add Locations that are missing?
If there is only one survey on the “Step 1 - Report Dashboard” screen, you will have the opportunity to add missing locations in Item 32. The added locations will appear on the “Location List” screen.
If there is more than one survey on the “Step 1 - Report Dashboard” screen, you can click the “Add Location” button at the bottom of the “Step 1 - Report Dashboard” screen.
How do I Delete Locations?
You may only delete locations that you added.
If there is only one survey on the “Step 1 - Report Dashboard” screen, you can delete added locations from the “Location List”: click the “View All” link in the “Number of Establishments in Survey” column, then the “Delete Added Location” button.
If there is more than one survey on the “Step 1 - Report Dashboard” screen, you can click the “Delete Added Location” button at the bottom of the “Step 1 - Report Dashboard” screen.
If applicable, see How do I report for locations that are no longer active?
How do I report for locations that are no longer active?
Complete the survey for the portion of 2017 that the location was operating as part of the company or organization.
If one of your existing locations is no longer in business, please complete the Operational Status question:
- Operational Status is Item 3 for surveys listed on the “Step 1 - Report Dashboard” screen.
- For Consolidated surveys and “NC-99001(L),” click the “View All” link on the “Step 1 - Report Dashboard” screen. On the “Location List” screen, the Operational Status question is listed for locations with “Type” is “Pre-listed…”
How do I move forward when I receive an Error or Warning on a screen?
If data entered causes an Error or Warning to appear at the top of the screen, you can choose not to correct the data at this moment, and you can move to the next screen by clicking the “Save and Continue” button again. You will have an opportunity to correct Errors and Warnings from the “Step 2 - Review” screen.
How do I complete the economic census in multiple sessions?
You can log in to your census bureau account multiple times to enter data into your survey(s). If you are in the middle of completing a survey, make sure you click the “Save and Continue” button to save the data on the screen before Logging out. You can log in to your census bureau account and resume entering data at a later time.
How do I get back to the question view, when I am taken to the “Location List” screen?
Use the “Back” button or the “Go to Screen” dropdown to return to the questions.
If the “Back” button or the “Go to Screen” dropdown are not available:
- Click the “Return to Report Dashboard” button.
- Click the “Resume” button from the Step 1 - Report Dashboard.
- Use the “Back” button or the “Go to Screen” dropdown to return to the questions.
How do I correct my data that were already entered (or already submitted)?
From the “Step 1 - Report Dashboard” screen, in the “Status” column, click the “Resume” or “Submitted” button for the survey you wish to correct the data. This will allow you to use the “Go to Screen” dropdown to choose the screen(s) that need to be updated. You can then go to the “Step 3 - Submit” screen and submit your corrected data.
If you have more than one survey on the “Step 1 - Report Dashboard” screen, you can correct data already in the system, by downloading and uploading a spreadsheet template using these buttons, “Download Spreadsheet Template” and “Upload Completed Template.” You may upload multiple times. For more information, please see How do I download spreadsheets? and How do I upload spreadsheets with data?
How do I download spreadsheets?
From the “Step 1 - Report Dashboard” screen, click the “Download Spreadsheet Template” button.
You can download survey spreadsheets listed in the grid:
- You can select multiple surveys or choose the top check box to select all the surveys.
- Click the “Continue” button and follow the steps to open a Zip file with the survey spreadsheet(s).
You may choose to download the “All Locations” spreadsheet.
- Click the “All Locations” button and follow the steps to open a Zip file with the spreadsheet.
- It may be helpful to download the “All Locations” spreadsheet first to reconcile your locations to the downloaded spreadsheet:
- In the “All Locations” spreadsheet, you can update addresses, store numbers, add missing locations, complete “Operational Status” for closed or sold locations, and enter payroll and employment.
- This spreadsheet can be uploaded by clicking the “Upload Completed Template” button from the “Step 1 - Report Dashboard” screen.
- You can then download the survey spreadsheets listed in the grid and data uploaded from the “All Locations” spreadsheet will appear in the downloaded survey spreadsheets.
How do I upload spreadsheets with data?
To upload data, from the “Step 1 - Report Dashboard” screen, click the “Upload Completed Template” button. Browse to your spreadsheet and click the “Upload” button.
- Data goes through validations and a report is generated with potential issues.
- You can upload data multiple times.
- Blank fields in the uploaded spreadsheet will not overwrite existing data in the instrument.
How do I print a copy of my responses (before and/or after submitting data)?
From the “Step 3 - Submit” screen, in the “Responses” column, click the link for “View Responses,” which will allow you to download a PDF of your responses.
- You can use the “View Responses” link to review your data before submitting your responses.
- You can use the “View Responses” link to print your data after submitting your responses.
Or, if you have already Submitted your survey(s):
- You can go to the “Messages” button on the top right and Open your “Submission Report.”
- Click the “Print Responses to PDF” button.
- If only one survey was submitted, a PDF will open.
- If more than one survey was submitted, a pop-up will open:
- You can select multiple surveys or choose the top check box to select all the surveys to print to PDF.
- Click the “Continue” button and follow the steps to open a Zip file with PDFs of your responses.
- You can print 50 surveys at a time.
In some cases, you may have to download a spreadsheet to save a copy of your responses, which can be done by clicking the “Download Spreadsheet Template” button from the “Step 1 - Report Dashboard” screen. For more information, please see How do I download spreadsheets?
How do I verify my submission was received?
You can verify your data were submitted by clicking the “Messages” button on the top right, and then click “Open” on the “Submission Report” to see a summary of the number of surveys, how many were successfully submitted, and how many still need to be submitted.
Or, you can go to the “Step 3 - Submit” screen and check if there is a date and time listed for your survey(s) under the “Last Submission” column.
What is the “View All” link on the “Step 1 - Report Dashboard”?
This link is found in the “Number of Establishments in Survey” column on the “Step 1 - Report Dashboard” screen and takes you to a “Location List” screen. The “View All” link is available for:
- Companies that have one survey on the “Step 1 - Report Dashboard” screen and added locations in Item 32.
- Consolidated surveys that end in “A” where three or more locations are in a particular industry.
- Consolidated data is collected on Items 1 through 31.
- The “Location List” contains locations associated to the industry.
- NC-99001(L) surveys
- Consolidated data is collected on Items 1 through 4.
- In a census year, the “Location List” contains out-of-scope locations:
- Such as railroads, churches, agriculture, forestry, fishing, and public administration.
- Or foreign locations where employees at the location are reported on an IRS form 941 for an EIN that is also used at domestic locations.
How do I see the locations that were listed on Item 5A of the NC-99001(L) for the 2016 Report of Organization survey in the 2017 Economic Census?
In an Economic Census year, the locations that are listed in Item 5A on the NC-99001(L) are only for out-of-scope locations. In an Economic Census year, many companies (with more than one survey) will receive the NC-99001(S) which contains the company questions, but not locations in Item 5A. Therefore, all or most of the locations from the 2016 Report of Organization will either receive its own survey on the "Step 1 - Report Dashboard" or will be listed on a Consolidated survey that ends in "A." To see the locations on the NC-99001(L) or Consolidated survey, click the “View All” link on the “Step 1 - Report Dashboard.”
Page Last Revised - April 21, 2022
✕
Is this page helpful?
 Yes
Yes
 No
No
 Yes
Yes
 No
No✕
NO THANKS
255 characters maximum
 255 characters maximum reached
✕
Thank you for your feedback.
Comments or suggestions?

Comments or suggestions?